


You’ve set up your PC, and your CPU is all ready, so what next? Get a cooler to ensure that your CPU doesn’t heat up during peak performances. Getting a high-performance cooler that suits your requirement is going to be a big deal. But the problem with high-performance CPUs is, they do not come without some drawbacks.
Particularly the heat generation due to the heavy usage and rendering sessions can become quite resource-intensive. If you are a gaming geek who uses high-end processors like i9, then you would know the importance of getting cpu coolers for i9 processor. Many users will spare no expenses in acquiring high-end processors like the i9 but do not think about the role of a good CPU cooler important role in enhancing and safeguarding pricey components.
Now once you do get a cooler comes the real question. That is, How to Install a CPU Cooler? Well, don’t worry, you don’t have to do it on your own. Follow this step-by-step guide, and you will have your CPU Cooler up and running in no time. Now without any further ado, let’s move on to the article.
Step 1: Apply thermal paste (or check if it’s already been applied)
You should know that there should be a thin layer of a thermal compound that eliminates any gaps between the CPU lid and the base of your CPU cooler.
Sometimes coolers have thermal paste applied on them when you get them from the factory. In this case, place it in as is and do not apply an additional coating.
Now, if your cooler doesn’t come with thermal paste on it, you should apply thermal paste to the top of your CPU lid. There are different methods to go about doing this. The first one is where you just make a dot with a small amount of paste. The second one is where you spread a line across the CPU lid. The last and perhaps the most efficient method would be to spread it over the CPU lid evenly with a credit card. We recommend that you go with the third one.
Step 2: Installation of additional accessories and brackets.
If your CPU Cooler is water-based, this is the right step for adding the radiator to your case.
To keep your cooler stable within the CPU, you will need a bracket. Install a bracket behind your motherboard so your cooler can connect to it. The complete kit of most coolers comes with the right brackets. However, if your cooler doesn’t come with one, you can buy a standard CPU bracket from any store that sells PC components.
Step 3: Align it over the CPU
Before lining up the cooler over your CPU, please ensure that you remove the fans from your cooler for the sake of safety. Take the cooler and hold it over the CPU. Then, you should carefully line up the screws with the holes in the brackets that you earlier attached to your motherboard. Lower the cooler onto the CPU and make sure that you have placed it as even and aligned as possible.
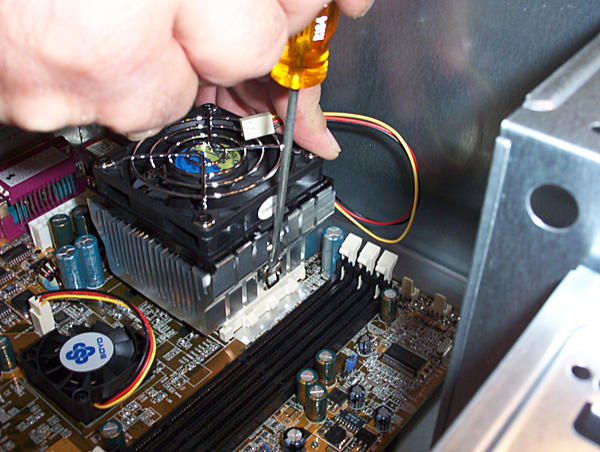
Step 4: Attach the CPU cooler to the mounting bracket.
Once you’re sure that the CPU cooler is aligned well, go to the next step. So tighten in the screws using an X pattern. Start doing it lightly first, then slowly increase tension with every turn. Be gentle and use your wrist while tightening the screws. Do not by any means use a square pattern while tightening the screws. If you do tighten the CPU cooler in a square, it may create uneven pressure across the processor and may impact cooling.
Step 5: Attach remaining components of the CPU Cooler.
Remember how you had to detach the fans? Once you have the CPU cooler tightly attached to the bracket, reattach the fans back into the cooler. Your cooler kit will have a manual for it; please refer to the same.
If you’re using a water cooler, it is at this point that you need to connect the radiator, any coolant reservoirs, and the water pump to one another. Make sure that you attach every one of these components tightly to each other. This is because if they are not sealed well enough to be watertight, then they can end up leaking all over the rest of your components.
Step 6: Plugin all components and do a test run.
Once you are done with all the attaching and connecting, the next important step is to test everything out. This step is essential and not to be skipped. Because of this step, you can figure out early on if there are leakages, short connections, or any other flaws in your setup.
The first thing in this step is to see if water pumps, air cooler fans, and radiator fans are all connected to the right power source. A simple air cooler fan will have a specific point on the motherboard that you can connect it to with ease. Once you have all of these components, just do a trial run where you inspect how all the parts function. Once all of these are running smoothly, you’re good to go!
Conclusion
This pretty much sums up the answer to How to Install a CPU Cooler? If you follow the step-by-step guide that we have made for you, it shouldn’t be hard for even a beginner to have your cooler up and running within an hour.


